How to install Kurapia Plugs with Subsurface Drip Irrigation
Drip Irrigation is a technique that has become more viable and affordable in the past few years. While each company makes a different type of emitter, they usually all feature a subsurface pipe that emits water in built in emitters. The spacing of these emitters can vary from 12” to 18” to 24”. For the quickest and most even coverage, we recommend the following advice.
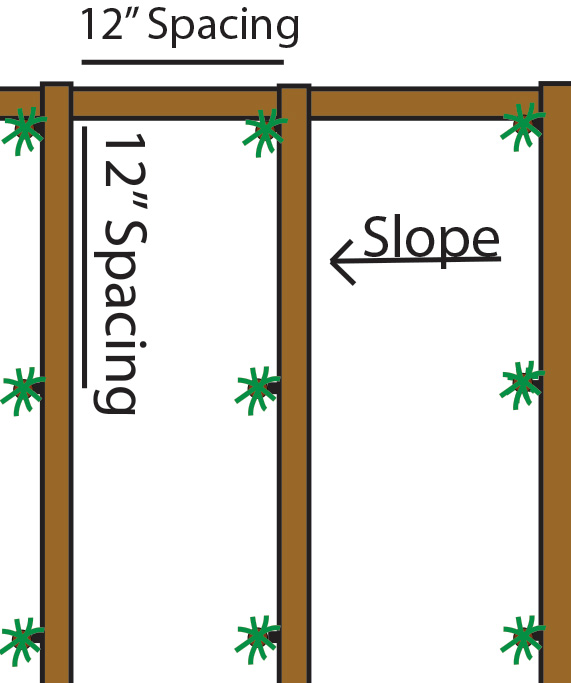
Top view of a drip irrigation installation, with plugs and their planting holes directly next to the drip emitters, with matching 12″ spacing
Always plan ahead. You want the lines of your subsurface emitters to be above the grade of the soil (if possible) and you want the emitters to flow into the planting hole.
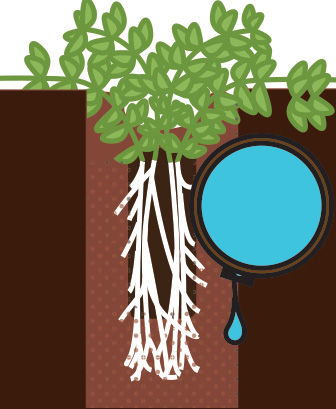
3/4″ subsurface drip emitter dripping into the newly planted plug’s planting hole
For planting, we’ve found that plugs work best with drip if you use a bulb auger and incorporate organic material to help the soil absorb water around the plugs. This works best for sandy soil installations but also helps with clay soil, as mixing in some organic mix the drainage will be improved. For sandy soil the best options are well rotted compost (such as what is used for growing lawns from seed), peat moss, or coconut fiber (the greenest alternative).
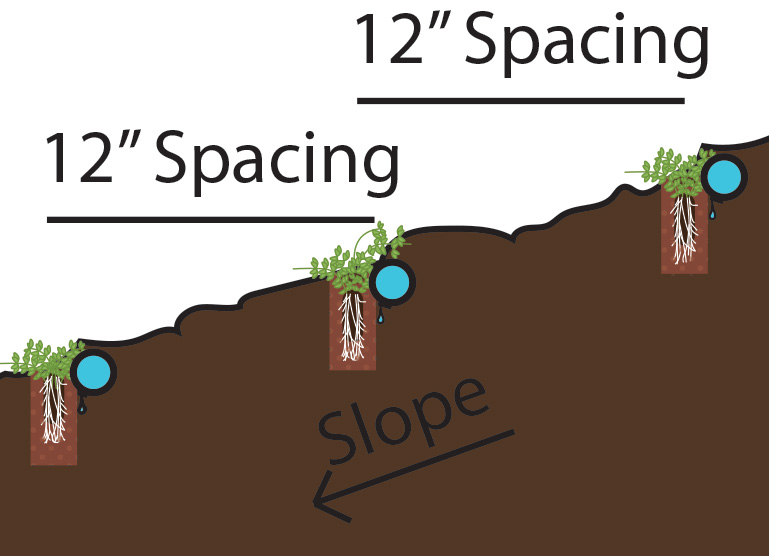
Kurapia plugs spaced 12″ away from each other on a hillside, with emitters slightly above the grade so emitters can flow into the planting hole
The strategy is to ensure that the emitter flows directly into each planting hole, with the plug slightly below grade, so the emitter flows directly into the planting hole. The key is to ensure the plugs do not dry out as it grows deep roots.
- Spacing of subsurface emitters must be 12”.
- Plug spacing should also be 12”, matching the placement of each emitter.
- Emitters needs to be submerged around 1 ½ to 2” deep, ensuring coverage to enable mowing and foot traffic.
- Emitters should flow directly into a freshly planted plug and planting mix. For sandy soil please use a more absorbent planting mix such as seed planting mulch, well-rotted compost, peat moss, or coconut fiber. This will wick water back to the plugs
- Placement of the emitter should higher on the slope that the plugs. This will ensure the water from the emitter will flow into the plug as it’s getting established.
- As the Kurapia plants grow from the plug, the emitters should be able to saturate the entire soil area to ensure the plugs can spread and fill.
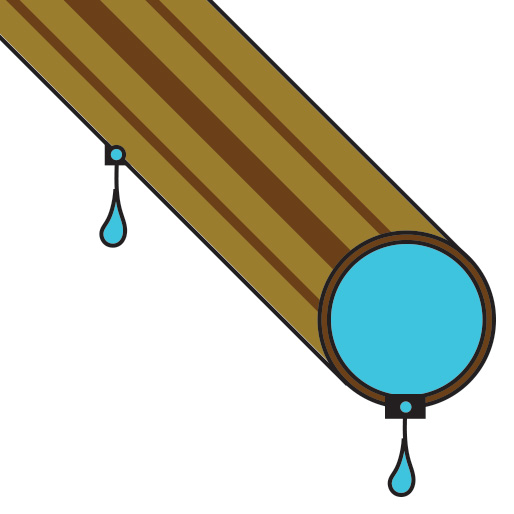
Which subsurface drip irrigation products do we recommend? There’s several we’ve found to be fantastic, although costs can be a factor. Be sure you check with a few companies and consult with an irrigation specialist if you can. While inline drip systems are fantastic ways to save water and money, they are not easy to install and can be tricky to maintain, but they’re worth the work. A few products we’ve found to be very good with Kurapia (with links to directions from the respective companies are as follows.
Keep in mind that it’s good to plan for the future, so invest in copper lined tubing. The copper prevents roots from growing into the tubing, which can be quite useful when dealing with the fast growing roots of our Kurapia New White and Kurapia Pink plants.
Netafim (especially the Techline Copper) is on top of the market for a good reason. High quality lines, copper shielding, and incredible reliable lines. Pricing can be prohibitive for some, but if quality is always a good investment. Be sure to
Toro has several products on the market, from the Blue Line and Stripe of old, to their new SDI Drip Tape. Toro’s products are more affordable priced and while hard to find sometimes, can be a reliable choice.
While many Rainbird products are on the market, the best are the copper tubing. While better for a less flexible budget, Rainbird’s newest copper lines seem to be easy to work with and producing quality results for the cost.
Thank you for visiting Kurapia.com, the ultimate drought tolerant groundcover and lawn alternative.